In this article I’ll show you the easiest way how you can create 3D infographic (3D design, images) for free from scratch. I’ll also show my own 3D infographic example (and I give it away for free!) of using this 3D approach in blogging. Besides, I’ll give you some ideas how you can use this 3D stuff easily to stand out in the crowd of other bloggers. Read this article and let your creativity go wild in literally minutes with no prior 3D design skills.
Intro
I created it in TinkerCad and visualized with SketchFab
3D is inevitably getting more and more into blogging and marketing. It’s already widely used in e-commerce and it’s the upcoming trend in designing, visualizing data, creating infographic, telling stories, adding interactivity to your website, provoking more visitor engagement, increasing conversions etc.
The difficulty though is high costs of working with 3D because it requires a lot of skills and time to create something cool. Moreover, almost any 3D modeling software has a steep learning curve and you need to invest quite a lot of time in it.
In one of my previous articles I demonstrated how you can use a free online tool Sketchfab that allows to edit and visualize existing 3D models and scenes with minimum efforts, maximum results and without paying a cent.
And in this blog post I continue the 3D topic for total newbies and show you how to create 3D models (including 3D infographic) from scratch using the simplest and free online tool TinkerCad.
In brief, this post contains the following:
- Overview of TinkerCad (free easy online tool for creating 3D models).
- How to visualize 3D infographic for free using Sketchfab adding interactivity.
- An example of 3D infographic that I’ve built from scratch with TinkerCad and visualized with Sketchfab for interactivity to use on my website.
- Ideas how you can use these free and easy tools for your marketing.
- Instructions how you can take, modify and use my 3D infographic.
And here ‘s the example of the 3D infographic I created specially for this blog post using TinkerCad and visualized with Sketchfab (it’s interactive – you can rotate, zoom, shift and click the annotations):
Continue reading and you will learn how to do a 3D infographic like this or better.
What you need to know before we start creating 3D infographic
In this article I show you the simplest and a free way I could find so far to create 3D objects (e.g. 3D infographic) so that you could use it for your marketing needs.
By the way, here are the requirements below. But don’t freak out, you can easily comply with them 🙂
- You don’t need any prior 3D design skills (even kids can do it).
- You will not need to learn a complicated 3D modeling software.
- You will not need special hardware for your PC that allows to work with 3D graphics.
- You do not need to install any software.
- You’ll just need to open your browser, go to www.tinkercad.com, spend several minutes on getting acquainted with a super simple interface and start creating.
- In order to benefit from visualization of the 3D infographic you created, you can use a free account of Sketchfab (by the way, you can read my blog post about using Sketchfab).
- Yes, and continue reading this blog post to see the details and my own example (I show how I use 3D to promote my the most useful blog posts, including the ones about fast and reliable hosting, website security, website backups and the best opt-in plugin).
In other words, you’ll get to know the simplest way to get your hands dirty with 3D and benefit from it as soon as possible. Right after reading this blog post you can start creating visuals and interactivity that help you stand out among other bloggers and small business owners who still use standard visualizing ways. And it all will not cost you a cent 🙂
And after I told you what you can generally do in TinkerCad, let’s see what you can’t do with it 🙂

TinkerCad is actually not for creating specifically 3D infographic
But no worries! TinkerCad is the simplest tool for creating 3D models for 3D printing. And it has some pre-built parameterized 3D models (including bars, pie-charts, text etc) which make it easier to create 3D infographic. And thanks to its super easy interface that even kids can use and the pre-modelled 3D objects with parameters, TinkerCad is a very convenient way for complete beginners in 3D to build not only 3D models for 3D printing but also 3D infographics for online marketing.
TinkerCad does not offer means for embedding your 3D model on your website
TinkerCad does not have options for convenient online presentation of your 3D model. I also recommend using Sketchfab for this function. Sketchfab is superb because it allows embedding 3D model (3D infographic) on your website and adding interactivity to your 3D model (e.g. you can rotate, zoom in and out, navigate within your 3D infographic, adding annotations with clickable external links on parts of your 3D infographic). You may see my example above for better understanding if you in doubt what it is about.
TinkerCad is not a painting program
One more important point regarding TinkerCad is that compared to other professional 3D modeling software, it has limited options in coloring your 3D model. You can color the parts of your 3D infographic with limited number colors. No advanced textures, shading or lightning which exist in professional 3D software suits. TinkerCad is much simpler and easier from this perspective.
TinkerCad is not a graphical editor
TinkerCad is designed to be a 3D printing design program, not a graphical design program. It means that you can’t use images as you can do it for example in Photoshop. However you can use images in TinkerCad in order to make a 3D object out of it (see Image Importer shape).
You can’t render very beautifully in TinkerCad
Although TinkerCad allows to pre-view your work in 3D which may be enough in some cases to make a screenshot, Tinkercad does not have a real rendering engine. It means that in order to make beautiful images of your 3D model (3D infographic) you need to export/import your model to another tool or application. I recommend using Sketchfab for this purpose (it’s a free and easy online tool that can be used for basic lighting and rendering).
TinkerCad is not really convenient for building super complex scenes
Complexity of your 3D model that you can create in TinkerCad is limited compared to professional 3D software. Creating very complex (large and/or very detailed) 3D infographic will be inconvenient in TinkerCad. For example, it does not have a tree of objects you have combined or grouped. But it’s not what you need to worry about, because as a beginner in 3D you will not likely to exceed TinkerCad‘s possibilities. And if it happens that you do exceed somehow, then it means that you are likely to have enough motivation to use more professional 3D modeling tools 🙂
TinkerCad does not have tons of ready-to-use models
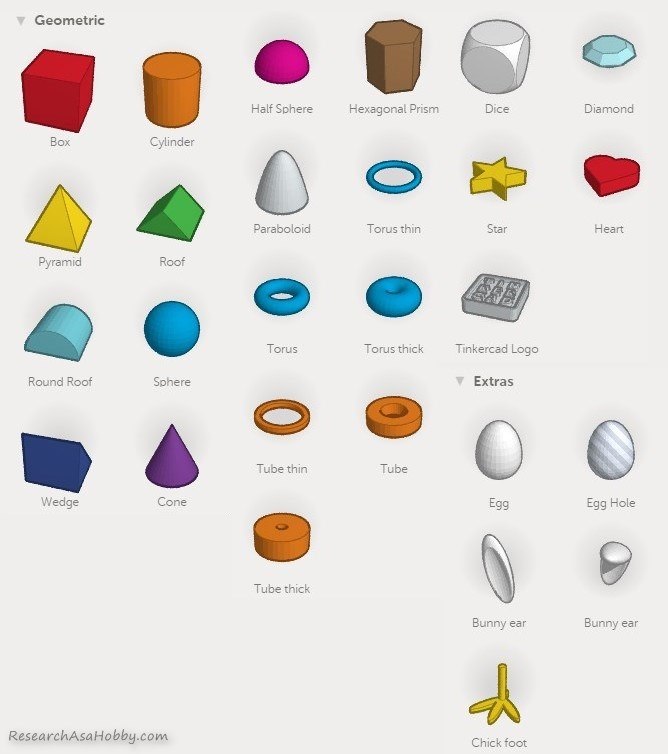
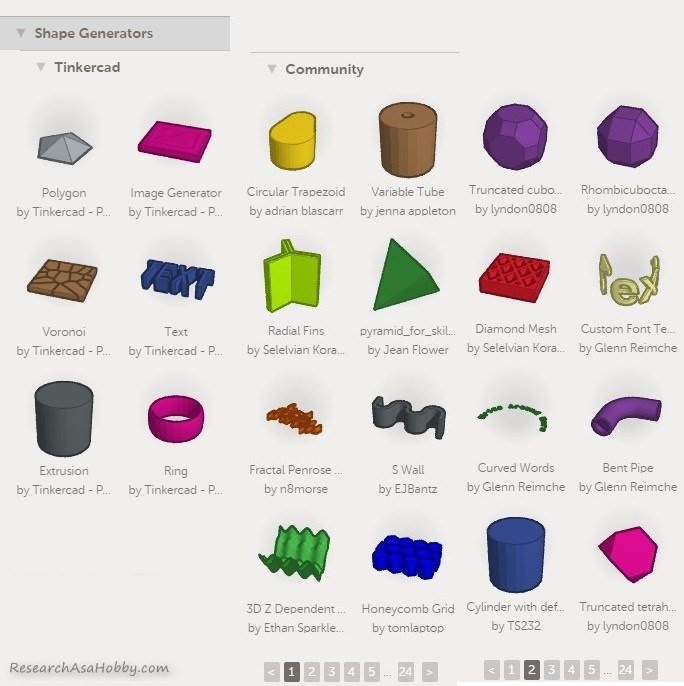
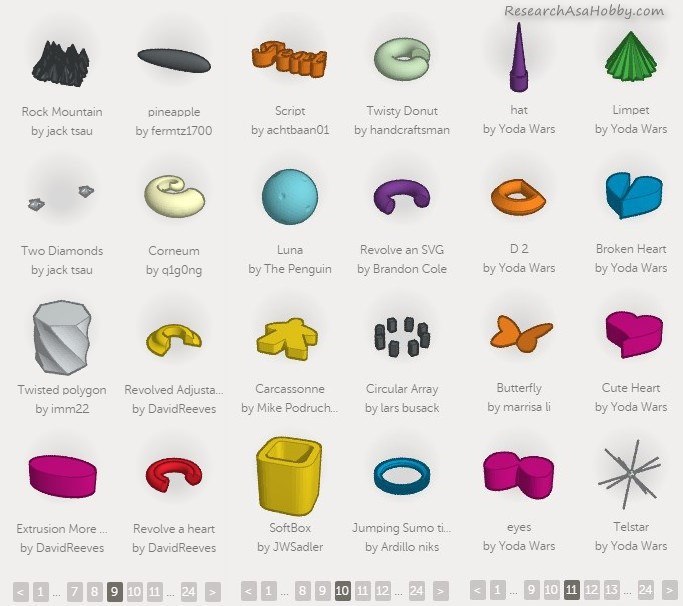
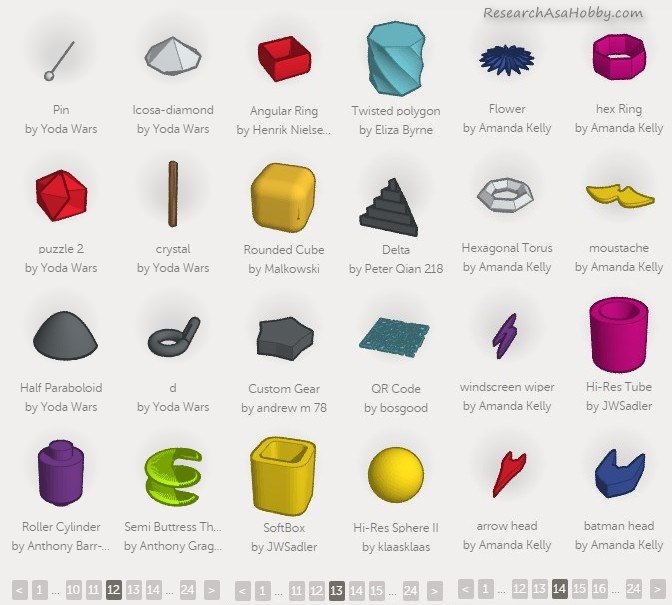
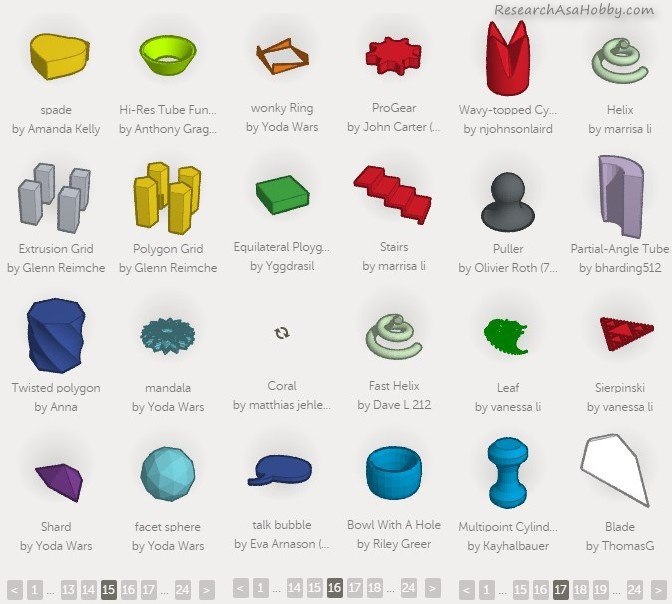
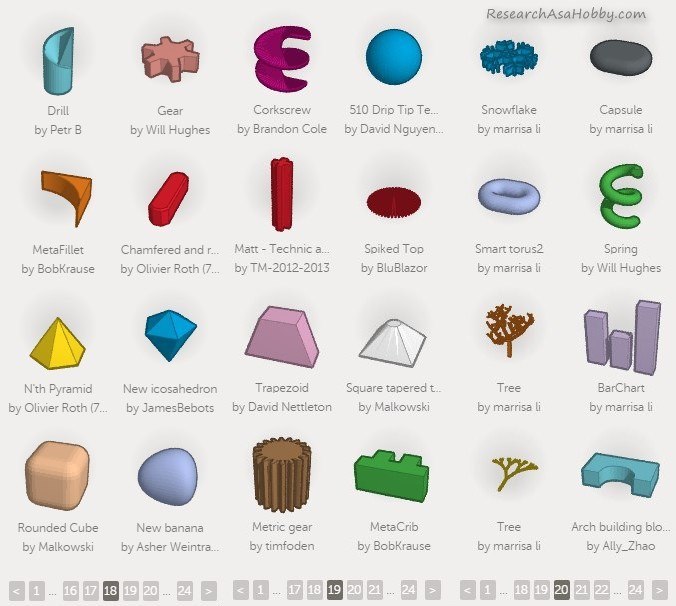
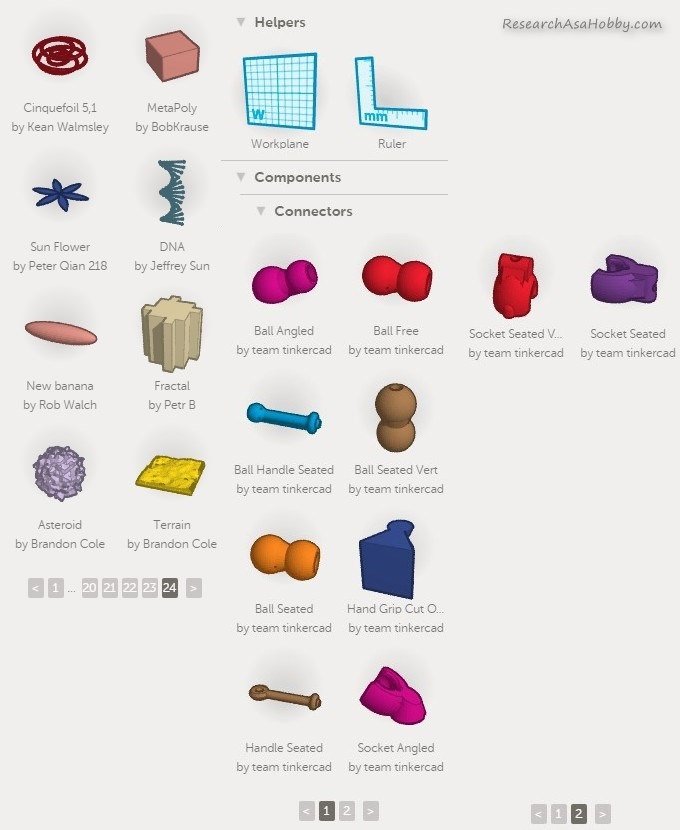
Although there are more than 200 (and counting) 3D models and objects which are adjustable with parameters, it will be not enough for you to built an interesting 3D infographic from ready-to-use pieces. In other words, you will likely need to combine pre-built simpler objects to build more complex parts of your 3D infographic. See below the examples of existing pre-built objects.
Hey! I hope this list of TinkerCad limitations was not discouraging 🙂 Remember, most of its limits is just the other side of its simplicity which is a huge advantage over other 3D modeling tools!
Let’s now look at creating a 3D infographic in TinkerCad in more practical examples below.
TinkerCad – How you can create 3D infographic easily and for free
There are many tools that you can use to create 3D models and make 3D infographic out of it. But almost all of them require quite a lot of time to learn how to use them. Moreover, many of them are not free. Put aside that you need a special PC hardware (not simple graphic card, enough RAM) to be able to use the 3D software.
TinkerCad is a great option that is fantastically easy, free, does not require any software installing and no special PC hardware. That’s why I recommend this online tool if you want to put a piece of 3D world onto your website or add another dimension to your marketing, if you have never dealt with 3D before and want fast results for free.
Overview of the workflow

There are three major steps of the whole process from creating your 3D infographic to using it:
- Create a 3D model (a 3D infographic) and color the parts of your model in TinkerCad. It’s the most time-demanding step. Depending on how beautiful you want to make your 3D infographic, you can spend hours and hours on this step.
- Export your model to .wrl file and import it to Sketchfab (sign up for free account here). It will allow you and others to view your 3D infographic and embed it on your website. Adjust some settings (position, background) for better representation. It’s a matter of a couple of minutes.
- Add annotations with clickable external links on your 3D model in Sketchfab if you want to add more interactivity and information for marketing purposes.
- Embed Sketchfab view of your 3D infographic on your website to navigate in 3D (and even in virtual reality) to enjoy! It’s almost an instant step 🙂
Let’s see closer at what is inside TinkerCad now.
Creating 3D infographic in TinkerCad
Before all, I call it 3D infographic in this article, but it’s just 3D model in TinkerCad. However, there are some pre-built 3D models available in TinkerCad which can be used specifically for creating 3D infographic, including but not limited to adjustable bar charts, pie charts, text, US states and EU countries maps.
You will find it very easy to work in TinkerCad even if you have never dealt with 3D software before.
Basically, you just add pre-built 3D models and objects (shape generators) on the workplace, adjust them, combine them, cut holes in them and thus make up your 3D creation.

And here are the pre-built 3D models (shape generators) available in TinkerCad:
I’d recommend looking through some TinkerCad tutorials and lessons. It will take you from several minutes to several hours if you take is very seriously to work them out.
Although TinkerCad‘s user interface and workflow are very simple and intuitive, the tutorials have tips and tricks (such as efficient navigation, hot keys, precision of object placement, best practices etc) that will let you work in TinkerCad more efficiently.
So, after you created your 3D infographic in TinkerCad, it’s time to let people (e.g. visitors of your website) see what you have done!
Moving your 3D infographic to Sketchfab for visualization
Since TinkerCad does not have means to let you embed created 3D models on your website, you’ll need to use some other tool for that. Sketchfab (sign up here) is a great free online tool that allows to do it very easily. It also lets you add clickable links and annotations on your 3D infographic.
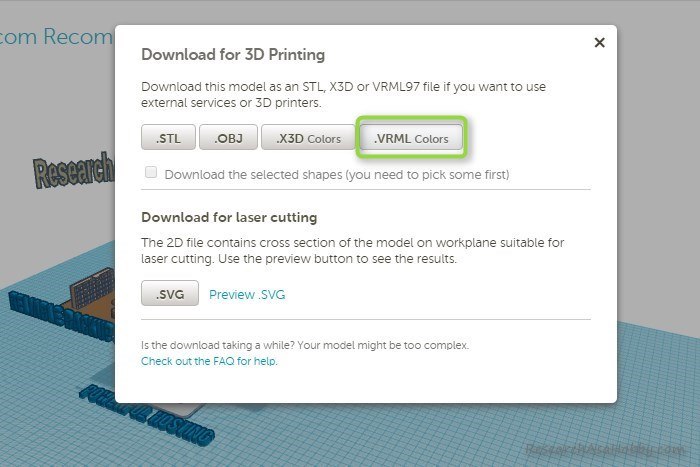
In order to move your 3D infographic to SktchFab, you need to export your creation from TinkerCad. I’ve found out that the easiest way to do so is to use .wrl file. Apart from the model itself it contains its colors as well.
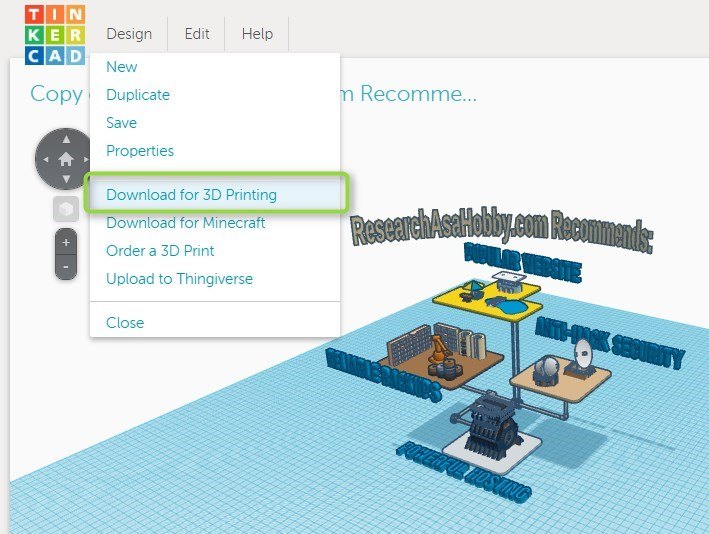
Exporting to .wrl file can be done very easily: when editing your 3D infographic, go to top menu / Design / Download for 3D printing / select .VRML Colors. The export file will be generated.
Save it to your local disk and that’s it with TinkerCad!
Now let’s go to Sketchfab (create a free account if you have not done so yet). And import (upload) your 3D model (3D infographic). In you Sketchfab account click Upload, and select the file you saved on the previous step.
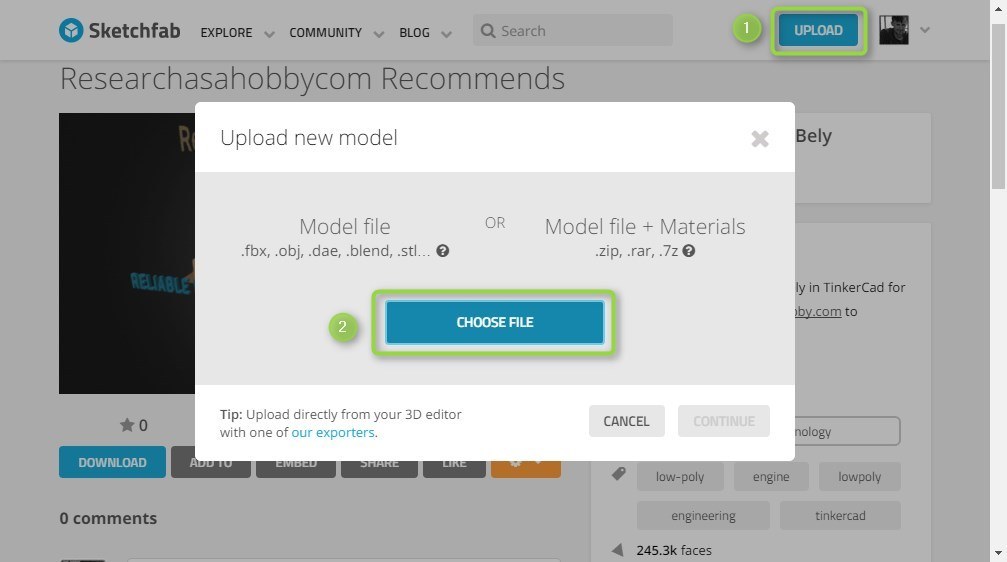
And then you will need to adjust some settings in the imported model (position, background, initial zoom level). It’s quite easy to do, but I’ve got a tutorial how to do it from one of my previous posts dedicated to Sketchfab.
Watch my video from 5:00 to 7:14 to see how to import a model to Sketchfab and adjust your 3D model’s position and background:
And watch this from 11:22 to 12:12 to see how to change the default view, particularly how to adjust the zoom level:
So, you have created your 3D infographic, imported it into Sketchfab for visualization, set it up for nice view. And now you can do the bonus part – add annotations with clickable external links to your 3D infographic. Sketchfab allows doing this. Read the next section how to do it.
Adding annotations and external links to your 3D infographic in Sketchfab
For marketing or informational purposes you may want to add annotations and clickable external links to your 3D infrographic in Sketchfab.
I have this covered in my blog post about Sketchfab in this section.
Ideas how you can use these free and easy tools for your marketing
Here are some ideas how you can use TinkerCad and Sketchfab:
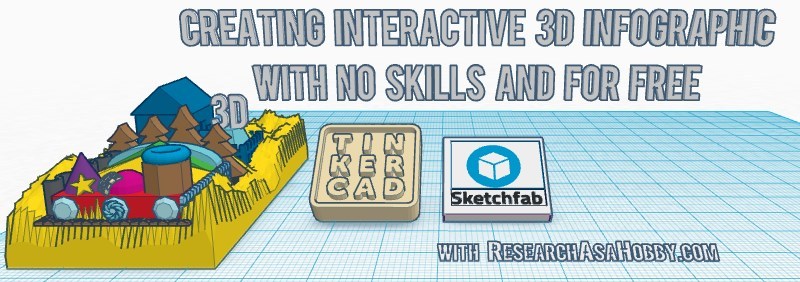
- Create title post images in 3D using 3D text and other objects in TinkerCad (then simply make a screenshot or export your 3D model to use Sketchfab‘s Screenshots function). By the way, the image title for this blog post I created very easily using just TinkerCad.
- Create explaining images in 3D using simple objects (e.g. create flow charts in 3D).
- Create 3D scene with your best or most popular articles
- 3D scene with your affiliate links.
- Create 3d cloud of your blog post tags with clickable links.
- Make a 3D scene and then record an explaining video (video story telling).
- Create your 3D logo from an image using TinkerCad’s Image generators (see what it’s like here)
- Use these techniques for creating 3D table of contents for your next blog post.
- Create an image with 3D objects and add clickable areas on the image with links to your blog posts, external resources, affiliate products etc (see tutorial)
- Find great free models created by TinkerCad‘s community and use them for your needs. By the way, you can use my 3D infographic – just download it, and modify it as you wish. Read the next section how to do it.
How you can take, modify and use my 3D infographic
You can modify and use my 3D infographic according to Creative Commons with Attribution license. To put it simply, in exchange for a link (a credit), you can download, modify and use it for free even for commercial purposes.
For example, you can simply replace 3D text “ResearchAsaHobby.com recommends” on “Your website recommends” and add your annotation and links to your blog posts from the copied 3D infographic 🙂
Here’s how you can do it.
You need to have a TinkerCad and a Sketchfab account (it’s all free). You need TinkerCad to modify the 3D model (3D infographic) and Sketchfab for visualizing your 3D infographic (e.g. for adding annotations to it, changing background, being able to embed it on your website).
- Go to my 3D infographic in TinkerCad.
- Click Copy&Tinker button. It will copy my 3D infographic to your account.
- Edit, tweak, modify the 3D infographic as much as you want and the way you want it.
- After your 3D infographic is ready, export it to .wrl file, and then import it to Sketchfab. See my instruction above how to do it.
- You can also add annotations and external links to your 3D infograpic (here’s how).
- That’s it! Embed your 3D infographic via Sketchfab on your website and enjoy!
Conclusion
3D stuff is beautiful, more engaging and more interactive than many other traditional means of visualization. But 3D is too complicated for most people and it requires skills and time to create something cool.
And as I want to make the 3D world a bit closer to you, I’ve found the easiest way to get good results in 3D for free. You can do it using TinkerCad for 3D modeling and Sketchfab for visualization.
I created the 3D infographic this way as an example and I share it completely with you so that you could benefit from it almost without any efforts.
Also I created the title image in the beginning of this blog post using only TinkerCad.
If you have been afraid of getting your hands dirty with 3D before, this article is the easiest starting point for you on your way to 3D world that can help you stand out in your marketing!

BTW, I respect your privacy, and of course I don't send spam, affiliate offers or trade your emails. What I send is information that I consider useful.





Absolutely loved the post–Thank you so much! I’m an artist and have been trying to teach myself graphic design so I can actually have a career after college. Just made a 3D model for a class project after reading your post… Can’t figure out how to export as a file with color for SketchFab. No VRML option in TinkerCad, do you have any ideas as to how I can save the color? Thank you!
Thanks for your warm feedback. Looks like my old-time post is still relevant to some extent 🙂
Tinkercad does not have VRML option any longer. Try using OBJ export option instead. You will get MTL file which contains color information. I think it should work.
I am looking for a 3D model with embed scripting to react base on on data or event.
Example.
-room with 3D model with objects (eg IOT devices).
-These devices are placed in the room and there are active and responsive.
pls advise on tools.
I have not used it myself for the purpose you are asking. But in general I think it depends what you want to be able to do with the 3d models/scene. Something can be done via Sketchfab API and its Lab functionality. There are other tools which allow manipulating in 3D scene (e.g. googling “make 3d application for web” returns some interesting results, e.g. Verge3D). Also you can build a totally custom application using a game engine that supports export to web like Godot, PlayCanvas, I guess. Hope it helps.
Its been Very Helpful thanks a lot
Glad you found it useful, Herbert.
Thanks for your comment!